Tuesday, July 17, 2012

You've all seen those cartoons where a character finds themselves out on the ice in the middle of a pond.  Or on a kitchen floor covered in marbles.  Legs go in every direction.  They slip.  Regain composure.  Start sliding again.  Steady themselves.  Their legs move rapidly as they try not to fall completely down.  Sometimes they make it through the ordeal unscathed.  Other times they end up on their rump and must carefully find their footing again.

This.  Is me.

It's obvious I haven't been posting about my weight loss, and the above described scenario is why.  There's been really nothing to report.  No milestones to write home about.  I gain a little, I loose that little.  The scale goes up a bit.  The scale goes down a bit.  As of tonight, I'm about 1# up from my absolute lowest.  I'm not freaking out about it.  I'm not even upset.  It is what it is and I will continue to maintain my current weight until I find the motivation to continue loosing that last 13# I want to loose.

A week ago at my Weight Watchers meeting, we talked about slip-ups.  That's what got me thinking about this blog post.  I knew I had to blog to keep myself accountable, but my "all or nothing" mentality was telling me it wasn't  worth blogging about.  

Well, no more all or nothing.  It's my goal to start blogging regularly again to share my struggles and triumphs with all of you.  Right now there are more struggles than triumphs, but I'm trying to look at them as learning opportunities.  

So, look your struggle square in the eye and tell it that it doesn't have power over you!  Take this moment.  This very moment and do something to change your struggle into a victory!

Here's to hoping to report a triumph next week!
Michelle

No "this is me this week" photo, but I will share this doosey from our 80's themed summer party this past weekend.  What a hoot!


Sunday, July 15, 2012

Guest Blogger - Camo Cupcake Tutorial

I'm always on the lookout for fun new recipes.  And what better way to add some shizam to a birthday bash than with a fun dessert for the kiddos!  That's why when I saw a friend on Facebook post a picture of her camouflage cupcakes from her son's birthday, I instantly asked if she'd be a guest blogger to tell us ALL how she did it!  Turns out, it's super simple.  But we can keep that secret to ourselves, ok?

So without further ado, courtesy of my friend Kelsey, the awesomest camo-cupcake tutorial EV-er.  Thank you for sharing this tutorial with us, Kelsey!!  


The cupcakes are unbelievably easy, just a little time consuming!

Ingredients:

1 Classic White cake mix

2 Classic White frosting containers

Food dye GEL- Black, Green, and Brown 
(I used a concentrated frosting gel because that's all I could find and it still worked great)

White cupcake liners


Mix up the cake mix as directed by the box then divide into 4. Dye one green, one black, one brown, and the last one use only one small drop of brown to make a beige color.


Now comes the time consuming part...drop small amounts of each batter color into the liners,


 switching between all 4 to create the camo look. 


Fill 2/3 full just as you would any other cupcake. Then just bake as directed on the box!

Enjoy!

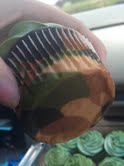
Here's what they look like when they come out of the oven!
You can even see the camo pattern through the liner.
Don't they look tasty?  Delicious AND cute.... I mean cool!  {Boys don't appreciate cute things.}
And of course her cutie-patootie son, Nolan, enjoying one!


Sunday, July 8, 2012

Farm Fresh


Do you watch American Pickers?  I {heart} that show!  After I watch an episode I'm all geared up to approach a random farmer and ask to pillage his barn! Especially after I got a fabulous idea on pinterest.  For those of you who have been in a cave, pinterest is seriously the ultimate website for organizing your craft ideas, home decor ideas, recipe ideas, fashion ideas... you get the idea.  I {heart} that website, too.

Anyway, after seeing the idea for using a door for a garden gate, I knew I had to do this.  But, like many projects, the time from conception to fruition is horribly long.  I scoured craigslist, the Habitat Re-Store, rummage sales, and curb sides looking for a door that would work.  I found a pair of lovely french doors to use - heavy beasts but gorgeous - but upon getting them home was told that they would not work.   So I kept looking when my fabulous friend Lana heard of my predicament and came to my aide.  She let me pick her BARN!

So, last weekend while we were there for a summer party, we stole away and climbed over chicken wire and raspberry bramble to get inside.  {you know those moments where a light shines down from heaven and you hear a choir singing}  You get the picture.  She had doors upon doors upon doors and we flipped through them for quite some time until we found the perfect ones.


A Saturday afternoon of hosing them off, busting the glass out and removing rusty hinges and we were ready to hang them.  The first one went up and I thought I was going to pee my pants I was so in love with it!  Then my wonderful husband got the other one up and I was more in love... but it needed something.  So I picked my own garden stash in the garage and found these iron shelf brackets that we've been storing for the last 5 years and they made the perfect addition to the bracing at the top.

One last final touch.  I wanted to make it personal.  Ever since I was little, I was called "beans" or "Shelly Beans".  Apparently there was a doll named Shelly Beans and voila.  I became Shelly Beans.   So I decided to add a touch of paint to say "beans' Garden" to welcome you as you enter the garden.

I think what I love love love about my garden and gate is that it reminds me of my childhood.  Finding spaces between trees that became doorways to houses.  Tufts of grass that became "pom pom world".  Uprooted trees that became caves and tunnels.  That sense of whimsy and pretend are alive as you step foot through the doors and into my garden paradise.  Hopefully the weeding fairies will find my garden now and bless me with fewer weeds!


I'm so freakin' in love with my new garden gate you may just find me sitting out there staring at it. 

Thursday, June 28, 2012

Testimonial time!

I know this blog is dedicated to DIY projects, parenting, gardening {among other things} but I also realize I can reach a vast number of people with this venue.

That said, I'd like to share with you these awesome bags I found.  I ordered the 3 Snack Bag pack from Better Life Bags for our on-the-go snacks and we use them all the time.  For goldfish.  For grapes.  For crackers.  For dry cereal.  You name it!  I love love love these little bags.  And I was able to pick the fabric I wanted for my bags.

And their mission statement made me want to order from her even more!

"...I desire to use my business and the platform it gives me to help others.  Since Better Life Bags started, I had been giving a percentage of the profits to low income entreprenuers in developing countries through Kiva.org.  I still plan on doing this in moderation.  However, I also want to invest in the community God has placed us in currently. ... "

This set was nice, because it has 3 separate sizes for whatever size snack you're bringing along, but I wanted to customize my order a bit.

So I asked!

Those are my three bags in the lower left corner!!
The wonderful people at Better Life Bags gladly accommodated and set up a new way to order the bags.  See, I wanted 3 of the large sandwich bags in different fabrics so each of my kiddos could tote a snack on the road and not complain about which one was theirs.  {I know.  Mine are the only ones who do this.}

With a large road trip coming up at the end of the summer, I ordered them right away! 

Friday, June 22, 2012

Thrifty Monogram

If you haven't guessed it by now, I'm one thrifty lady.  I like a good price, but I love a smokin' deal even better.  If you're like me, you know that moment when you find that nugget at a yard sale or thrift store that you're sure everyone else in the vicinity is after.  Your adrenaline kicks up to high and you make a bee line for it.  You snatch it up, quietly breathless, and try and conceal a smug grin that would give away your prized possession.  You pay up and there's a spring in your step as you carry it out to the car. 

That's how I acquired this gem.
I just knew I could turn it into something fancy shmancy, and I wanted the opportunity to prove it.

In a few days, it transformed into this.

It now resides as a toy chest in my son's room.  But I wasn't through there.  I had more DIY thriftiness in me this week.  I had purchased a plain, unfinished pine frame {5x7 opening} at Hobby Lobby a few months back but never got around to it.  I dug it out from the stash in the basement and took out the pressed board insert and used a scrap of burlap to cover it.  Just a little {okay a lot} of hot glue {and a few burned fingers} secured it in place on the back.

Then I painted the frame black.  And while that was drying, I free handed a letter "j" on the burlap.  I did a rough outline first and then took a small brush and some black acrylic paint I had on hand and sort of painted and "pushed" the paint into the texture of the burlap until it was filled in.  I love love love how it turned out. 

Now the cost breakdown:
-pine frame from Hobby Lobby $7.99 {minus the 40% off coupon I used on it}
-black acrylic paint for frame and letter {I had mine, so I don't know, but these are only a few bucks a bottle}
-burlap {if you don't have some on hand, buy only what you need.  most places will sell a minimum of 1/4 yd.   priced at a few bucks a yd, it would be ultra cheap for this little bit.}
-hot glue {had on hand.  and you should too.}

And here it is in place.

Thursday, June 14, 2012

Bandana Dress Tutorial + Bonus Project

If this is your first time visiting my blog - Welcome!  I hope you enjoyed my segment on Good Day Wisconsin this morning and have ventured here to get the details so you can make your girlies these super cute bandana dresses.  And how about how thrifty?!?!  A mere $7 if you don't use the 40% off coupon that Hobby Lobby has online.


As far as tutorials go, I'm still getting my feet wet with how to present them.  So if I'm not clear in an area or you're still confused on something, let me know and I can try to explain it better.  I would rate this as an INTERMEDIATE project, because while it's mostly straight seams, the ruffle is a little tricky.

Here's what you need for materials:
-Scissors
-Sewing Machine
-Thread
-4 bandanas
-Coordinating Ribbon
-Ruler
-Pencil
-Tape
-Matches or Fray Check
-Iron

Here goes!
P.s.  RST = Right Sides Together, RSO = Right Sides Out,  WST = Wrong Sides Together, WSO = Wrong Sides Out

The first thing is to create a pocket for the ribbon to thread through at the end.

Fold over 1 1/2" with WST and stitch a straight seam.  Do this on both red bandanas. 

Next, put both red bandanas {with pockets sewn} RST.  Measure down 6 1/2" from the ribbon pocket down the side and pin at that point to mark it.  Sew a straight seam from the pin down the side, away from the ribbon pocket.  Those will be the arm "holes" later.
You can see here the side seam and the top of the dress folded open.  It is inside out at this point.
 Now take the blue and white bandanas and cut 3 - 6" strips out of each of them.
{Note: if there is writing on the bandana, cut that off and do not use it.  There will be extra bandana material left after you cut the strips.}


Next, take the blue strips and sew the strips RST, end-to-end to make one long strip of blue.  Then do the same with the white strips.  Iron.

After that you will stack the long white strip on top of the long blue strip RST, and straight stitch the entire length.  When done, you'll have a long rectangle that's white on top and blue on the bottom.

{unfortunately, I didn't photograph this very well.  If you look at the finished dress, it'll make sense.}

Ok, so if there's a "tricky" part to this dress, this next part is it.  It's going to sound more complicated than it really is, so don't over-think it!  I would also suggest practicing on one of those scraps I mentioned earlier.

Keep your sewing machine set to a straight stitch, but increase the LENGTH of the stitch to as long as it will go.  Mine is a dial that ranges from 1-4 and I set mine to "4" for this.

Now we'll do the gathering stitch.  

Straight stitch along the length of the WHITE side of your white & blue rectangle.  It'll be a long stitch, but it goes fast with the stitch lengthened!  Straight stitch about 1/2" in from the edge.  
{Leave longer lengths of thread coming out from both ends of the stitch when done!!}
This is my practice piece.

 Before we actually gather the fabric, take the time to do a hem on the blue side now.  Fold the blue WST about 1/2" and do a straight stitch along the length of the blue side.  You will now have done a stitch down both lengths of that long strip of fabric.  One will be a finished edge, the other your gathering stitch.

Now we can make that cute ruffled gather!  Grasping both of the trailing threads on one end, pull gently on one at a time.  Only one will actually cause the fabric to gather.  Hold it taut and gently slide the fabric down the thread towards the other side.  

This is my practice one below.  When you gather the actual skirting, you will want to gather from each side, towards the middle.  It'll make it a lot easier!  And keep in mind that the gather does not have to be super tight on this dress.  Just a loose gather is fine.

 
 Now fold the gathered skirting's short ends RST and stitch to make the loop of skirting.  Again, look at the finished product, or my pictures below for clarification.
You can see above the hem stitch on the bottom, the gather on top and the side seam to join it into a loop.
  Now, lay the red bandana top RSO on a flat surface and slide the skirting piece WSO over the top.  It'll look like this.  {sort of like if your skirt blew up in the wind}

 
Work your way around that seam pinning as you go and adjusting the gathering so it's even all the way around.


Once you have it pinned all the way around, stitch around the waist seam you just pinned to attach the skirting to the red bandana top.  Remove pins as you go.  You will be able to futz with the gathering while sewing too.  Just take it slow.

Flip the skirting down and iron.

Now for the ribbon shoulder ties.  Cut 2 pieces of ribbon that are 1 1/2 times the width of the top ribbon pocket.  Singe the edges with a match to prevent fraying, or use Fray Check.


Take one end of the ribbon and tape it over the end of a pencil like this.

 
 Simply thread it through the pocket at the top of the dress.  Do this through both pockets.


You're done!  Have your sweet girlie step into the dress and tie the ends of the ribbon together over each shoulder.  VOILA!


HINT:  Be sure to tie the ribbons when washing so they stay put!

And get creative and even more thrifty.  Look for vintage bandanas and scarves at thrift stores and rummage sales to make into dresses and tops.  To make a cutesie halter top, just leave off the skirting and adjust the length of the bandana to how long you want the top to be.

Remember that BONUS  project I told you about?  How about using your scraps to make this:


Monday, June 4, 2012

make a statement

vignette {noun} 
{prounouced VIN-YET}

"The beauty of creating a vignette is that it's unique to you and what you want to express, and can be changed and rearranged whenever the mood strikes. "

In the design world, vignette's are all the rage.  They are a simple and cost-effective way to get the visitor to pause and find something unexpected and visual, and personal.  

Today I created one such vignette in my garden.  Using some Rue I purchased at a garden fair this past weekend, and rusty can from the garage and some leftover twine I hung this little number tucked into my viburnum that's finished blooming.  I love how the soft chartreuse leaves of the delicate Rue are a stark contrast to the rusty can.


 And another little piece I picked up whilst thrifting.  I just had to have it!  It was only $1.49, of course.  I'm not sure exactly where it will end up, or what it will hold, but I think it's wonderful.


Do you {heart} thrifting as much as I do??  Watch for a blog post coming very soon about my first full chair re-upholstery project.  Yikes!